
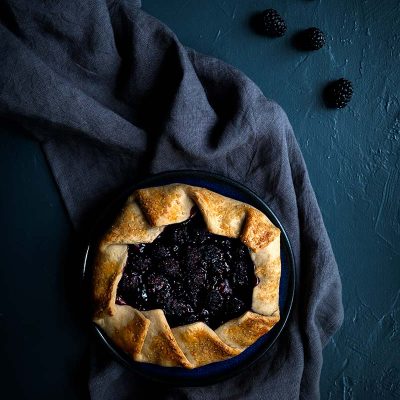
These sweet potato biscuits are tender and have just the right level of sweetness that they work as an accompaniment to a variety of dishes. Serve them alongside chili at dinner. For something completely different, try these sweet potato biscuits with pumpkin or apple butter for breakfast!

This is going to sound more intimidating than I mean for it to, but there’s a lot of technique that goes into proper biscuit baking. Have no fear, though; it’s all very straight forward.
I wish someone had explained all of this to me when I was first starting out, because it would have meant more tender, buttery results along the way and fewer dense, dry hockey pucks that needed to be dunked in sauce in order to be palatable.

These sweet potato biscuits follow all of the same rules as regular buttermilk biscuits. The key to keeping the sweet potatoes from weighing down the other ingredients is to use a cold puree.
While I could probably write an entire article on tips for better biscuits, I’ll stick with my top three tips for now.
Tip 1: Use Cold Ingredients
Biscuits get their delicate texture from the way the fat is dispersed through the flour. Room temperature ingredients will cause the fat to melt before it goes into the oven, which you want to avoid.
So if you have very cold butter but the puree is room temperature or warm, it misses the point. Some people even chill the flour in advance!
Also, keep in mind that your hands are warm. Work quickly while kneading the dough (sometimes I like to run my hands under icy cold water first).
Tip 2: Leave Larger Pieces of Butter in the Dough
Little pea-sized pieces of butter will melt in the oven, leaving flaky layers and steam that creates moisture and a natural rise. You want mostly coarse cornmeal sized pieces of butter, but don’t omit these larger pieces.
I think a pastry blender is the perfect, inexpensive tool for this job. While not ideal, you can get away with using your hands to incorporate the butter, but remember Tip 1.
As soon as the butter is mixed into the flour, place the mixture back in the fridge until everything is once again very cold before adding the wet ingredients.
Tip 3: Don’t Overwork the Dough
This is so important. Unless you’re cutting square biscuits, it’s basically impossible to avoid re-rolling the dough scraps at least once.
However, don’t forget that with every subsequent re-roll, you’re compressing those ingredients and venturing into hockey puck territory. Less is more.
Tip 4: Use Buttermilk Substitute
Out of buttermilk and don’t want to run to the store? Follow my quick tutorial and learn how to make buttermilk substitute!
I hope these tips are helpful for you! As I said at the beginning, none of these steps are difficult to accomplish, and it helps to understand why you’re doing them.
I hope I’ve shed some light on the subject, but feel free to leave any follow up questions for me in the comments.
These sweet potato biscuits have become a favorite around here, and I hope you love them as much as I do.

Looking For More Sweet Potato Recipes?
If you’re looking for some other ways to incorporate sweet potatoes into baked goods, I highly recommend checking out my sweet potato bagels, as well as my apple, sweet potato and bacon turnovers.

Sweet Potato Biscuits
Ingredients
- 1 small or medium sweet potato, peeled and cut into large pieces (approximately 8 ounces (see notes)
- 8 ounces all-purpose flour (approximately 1 3/4 cups), plus more as needed
- 1 tablespoon light brown sugar
- 1 teaspoon kosher salt
- 2 1/2 teaspoons baking powder
- 1/2 teaspoon baking soda
- 1/4 teaspoon fresh ground nutmeg
- 3 ounces unsalted butter, cold and cut into small pieces
- 1/3 cup cold buttermilk
- 1 tablespoon pure maple syrup, cold
- 1 tablespoon unsalted butter, melted and cooled (for brushing)
Instructions
- Place the sweet potato in a medium saucepan; cover with water. Bring to a boil and cook until tender, around 15 minutes. Drain, then puree in a food processor. Cover and chill in the refrigerator until the puree is cold, approximately one hour. (Note: do not skip this step; you need cold ingredients for delicate biscuits).
- Preheat oven to 425 degrees, and place a rack on the lower shelf. Grease an 8-inch cake pan with butter or baking spray.
- In a large bowl, whisk together the flour, sugar, baking powder, salt, and baking soda. Using a fork or pastry blender, cut in the butter until mixture resembles coarse cornmeal, with pea-sized lumps of butter remaining here and there. In a separate small bowl or liquid measuring cup, whisk together sweet potato puree, buttermilk and maple syrup; stir into the flour mixture until just combined (do not over-mix).
- Turn out the dough onto a lightly floured surface, kneading gently a few times until the dough comes together. If the dough is too sticky to work with, kneed in 2-3 additional tablespoons of flour. Pat or roll the dough until it’s approximately 1-inch thick. Cut the biscuits using a 2 1/2 inch cutter, as close together as possible. Re-roll the scraps to cut the remaining biscuits (do not reuse scraps more than two times; once is ideal).
- Arrange biscuits snugly in pan (to help them stay upright). Brush with melted butter. Bake until fluffy and golden, rotating once, 20 to 24 minutes.
Notes
Please read my full post for additional recipe notes, tips, and serving suggestions!
Nutrition
Recipe Troubleshooting
For immediate help troubleshooting a recipe, please email me using the form on my contact page. I’ll try to respond to urgent questions as quickly as possible! For all general questions, please leave a comment here :)


These biscuits looks amazing!
beautiful, a combination of my favorite things, sweet potato and biscuits, thank you! Perfect for my day off of my diet, love and miss biscuits and with sweet potato even better!
I made these yesterday and my family loved them, thank you for sharing this wonderful recipe.
I made these two days ago and again today for my husband’s southern family. They loved them as did I. I was a first time biscuit maker and your tips really helped! Delicious!!
Hi, I just wanted to double check that these should definitely be cooked on a lower shelf in the oven? Wouldn’t want to go to all the trouble only to burn the bottoms!